
Cleaning a Blackstone griddle is easier than you might think. Having a good cleaning and maintenance routine is the best way to keep your griddle in top shape for years of cooking. In this post, I'll walk you through the simple steps we use after every cook on our Blackstones to clean and protect them so they're always ready for our next great meal.
As a member of a few Blackstone and griddling groups on Facebook, I've read many different opinions about when and how to clean your griddle-not everyone agrees on the "when's" and "how's"!
We like to follow a simple Scrape-Steam-Oil process to clean our outdoor griddles after every cook (this does not apply to ceramic-coated models). When done right, it won't damage your seasoning and will help condition and maintain it.
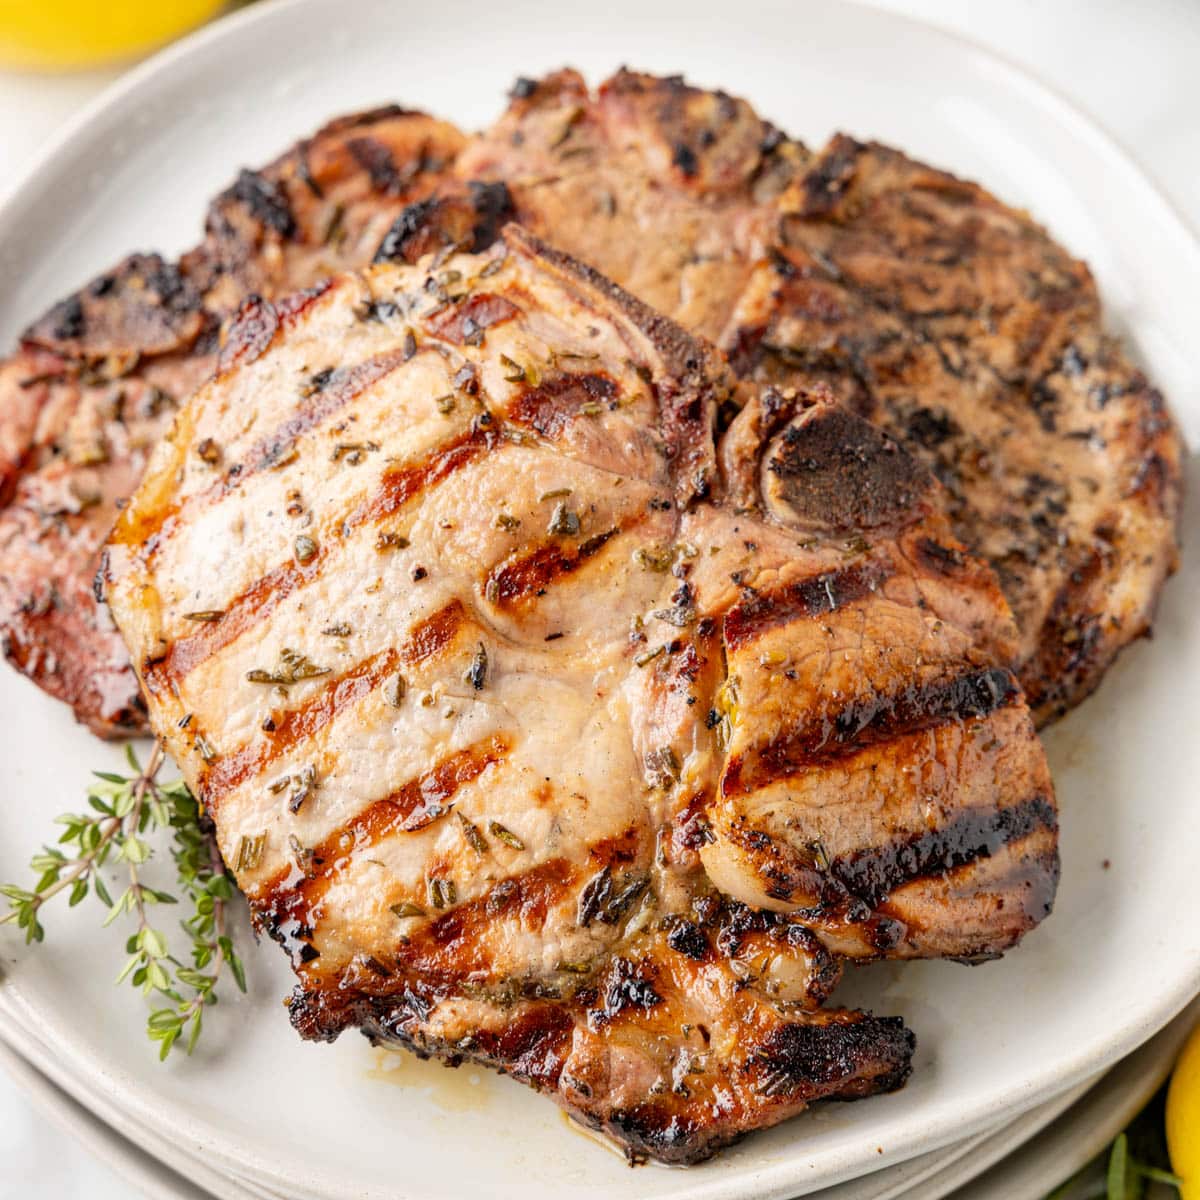
The griddle shown in this post is our 36" Blackstone Culinary Series, which we've had for nearly 4 years. Using this cleaning and maintenance routine, we've never had to strip and reseason it after the initial setup. There's been no rust on the cooking surface, and we've never had a problem with sticking.
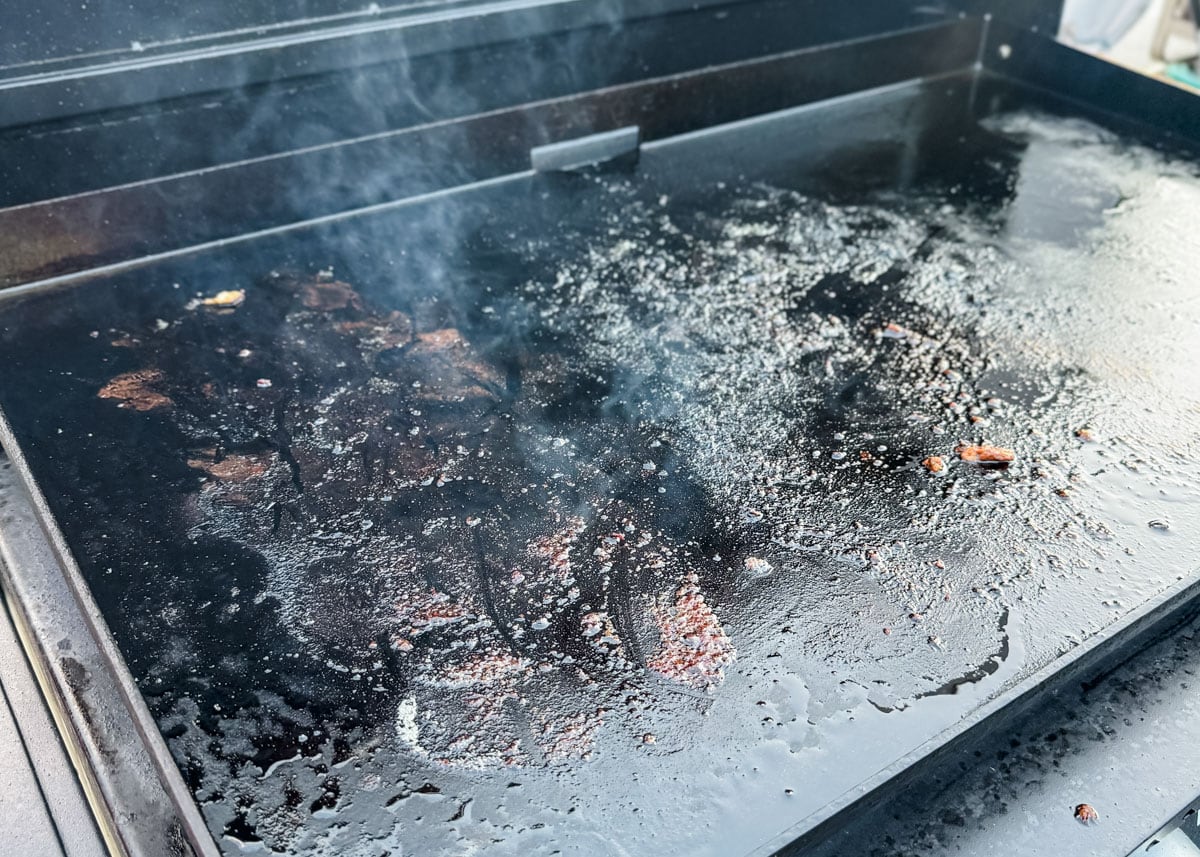
Not every meal leaves as much residue on the griddle as you see in these photos. Some foods are much neater and will clean up even faster. I purposely photographed the process after making Chicken Fajitas since marinades can be messy. Even so, the griddle still cleaned up beautifully!
Griddle Cleaning Supplies We Use

- Straight-Edged Spatula or Griddle Scraper: For loosening cooked-on food bits and marinades without damaging the seasoning. The one shown in the action photos is an angle scraper, but any sturdy, flat-edged spatula will work.
- Paper Towels: For wiping down the cooking surface and soaking up grease and water during cleanup. Since you'll be dealing with a lot of grease and grime, disposable paper towels are your best bet-cloths are a pain to wash later.
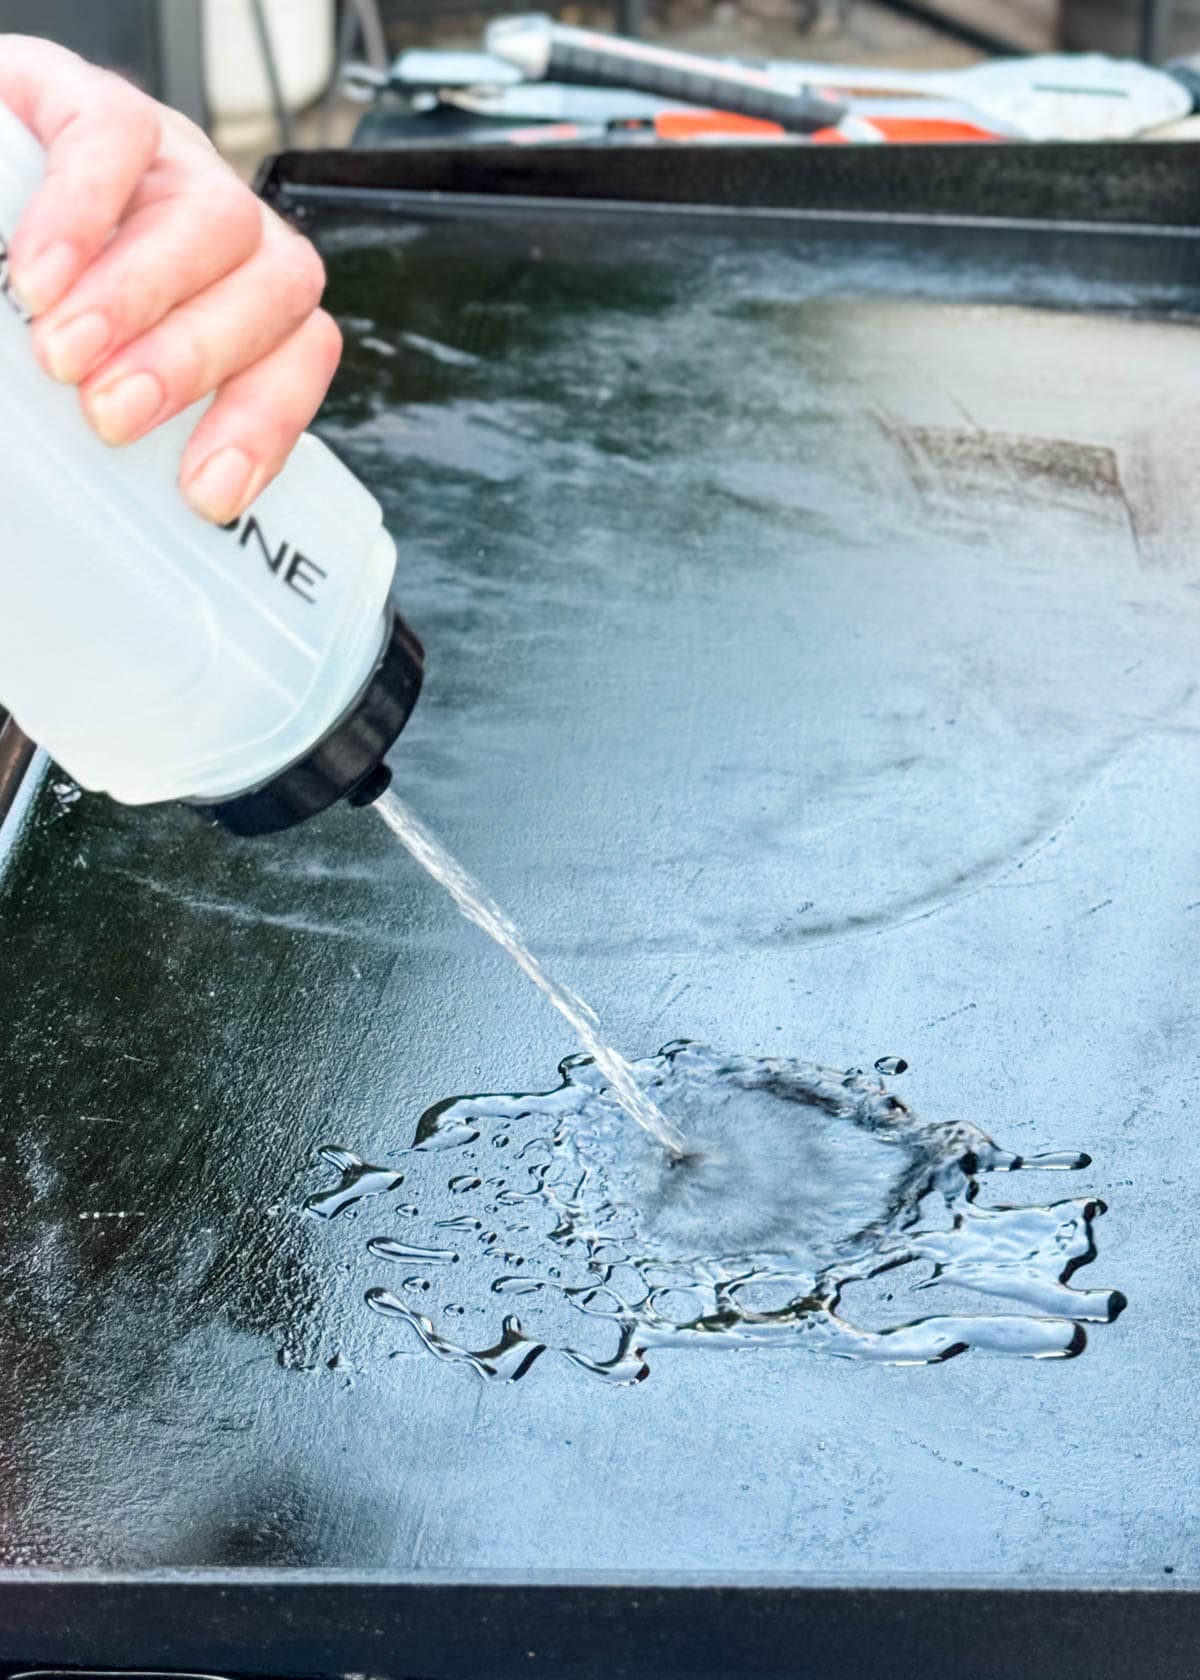
- Room-Temperature Water: For steaming residue off of the cooking surface. We use a squeeze bottle-Blackstone's square bottles are our go-to for both water and oil.
- Neutral, High-Heat Oil: To protect the griddle from rusting after cleaning and between cooks. We typically use vegetable oil. If we aren't going to cook on the griddle for a while, I use Blackstone's Griddle Seasoning and Conditioner {affiliate link}, which has a bit more oomph to it.
- Trash Bag: Keep one open closeby to toss out the greasy, used paper towels.
- Degreaser Spray (Optional): For cleaning the griddle's shelves, lid, and frame. We like Blackstone's 2-in-1 Degreaser Cleaner. Remember, this is just for the body-no soaps or degreasers are needed on the cooking surface for regular maintenance.
- Heat-Resistant Grilling Gloves (Optional, but Recommended): I usually wear gloves when scraping and steaming to protect my hands (and yes, my manicure). Jamie, pictured here, prefers working without. If you go with gloves, long neoprene-coated grilling gloves {affiliate link} are great-they protect your hands from heat and are easy to clean afterward.

Cleaning Your Griddle After Cooking in 4 Steps
Step 1: Scrape the Griddle
Once you've finished cooking and removed the food, turn off all the burners and propane tank. When we've been cooking at low or moderate griddle temperatures, we typically move right ahead with cleaning. If, however, the burners were on full blast and the surface is extremely hot, we like to let the griddle cool for a few minutes before proceeding.
We find that it's best to start the cleaning process while the griddle is still pretty warm. This makes it easier to remove cooked-on bits before they cool all the way down and harden on the surface.
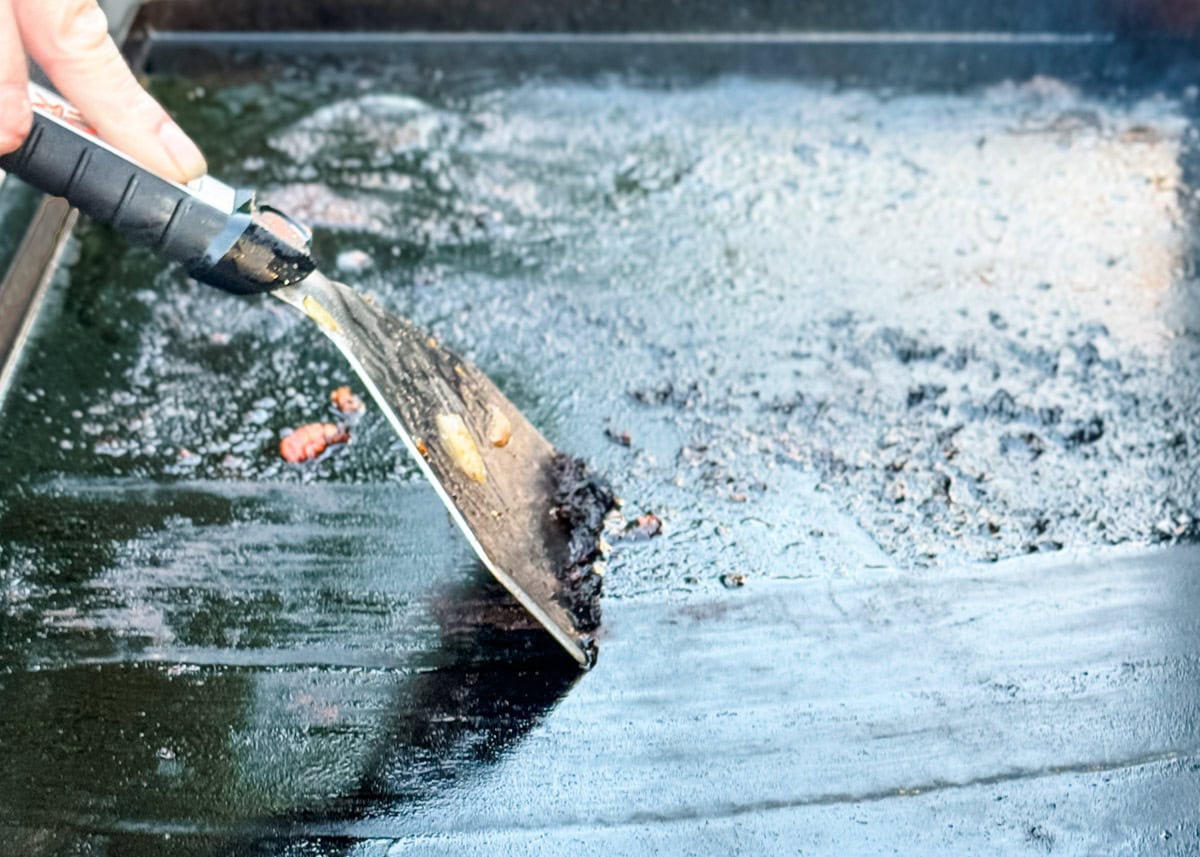
Using the flat edge of your spatula or scraper, use light pressure to loosen and push anything stuck to the cooking surface into the grease trap. Be careful to keep your hands and arms away from the hot surface. (Again, heat-resistant gloves are a good safety precaution here.)
Griddle scrapers usually have sharp edges, so there's no need to press too hard. You also want to avoid gouging the seasoning by digging into it with the spatula's corners.
After scraping, some oil will remain on the surface. Take a few dry paper towels and wipe it down to soak up the remaining grease before moving on to the steaming step.
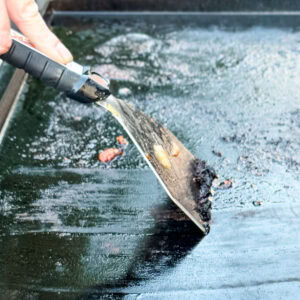
Step 2a: Steam Away the Residue
Now it's time to tackle the remaining residue after scraping. Stand back a bit to keep your face and arms away from the steam that will rise, and squirt room-temperature water across the warm griddle surface. The water will bubble up, loosening up any stuck-on bits-just like deglazing a pan on the stove.
If the griddle has cooled down too much for the water to sizzle, turn the burners back on for a minute or two until you get that bubbling action. After it's warmed back up, shut off the griddles and gas again.
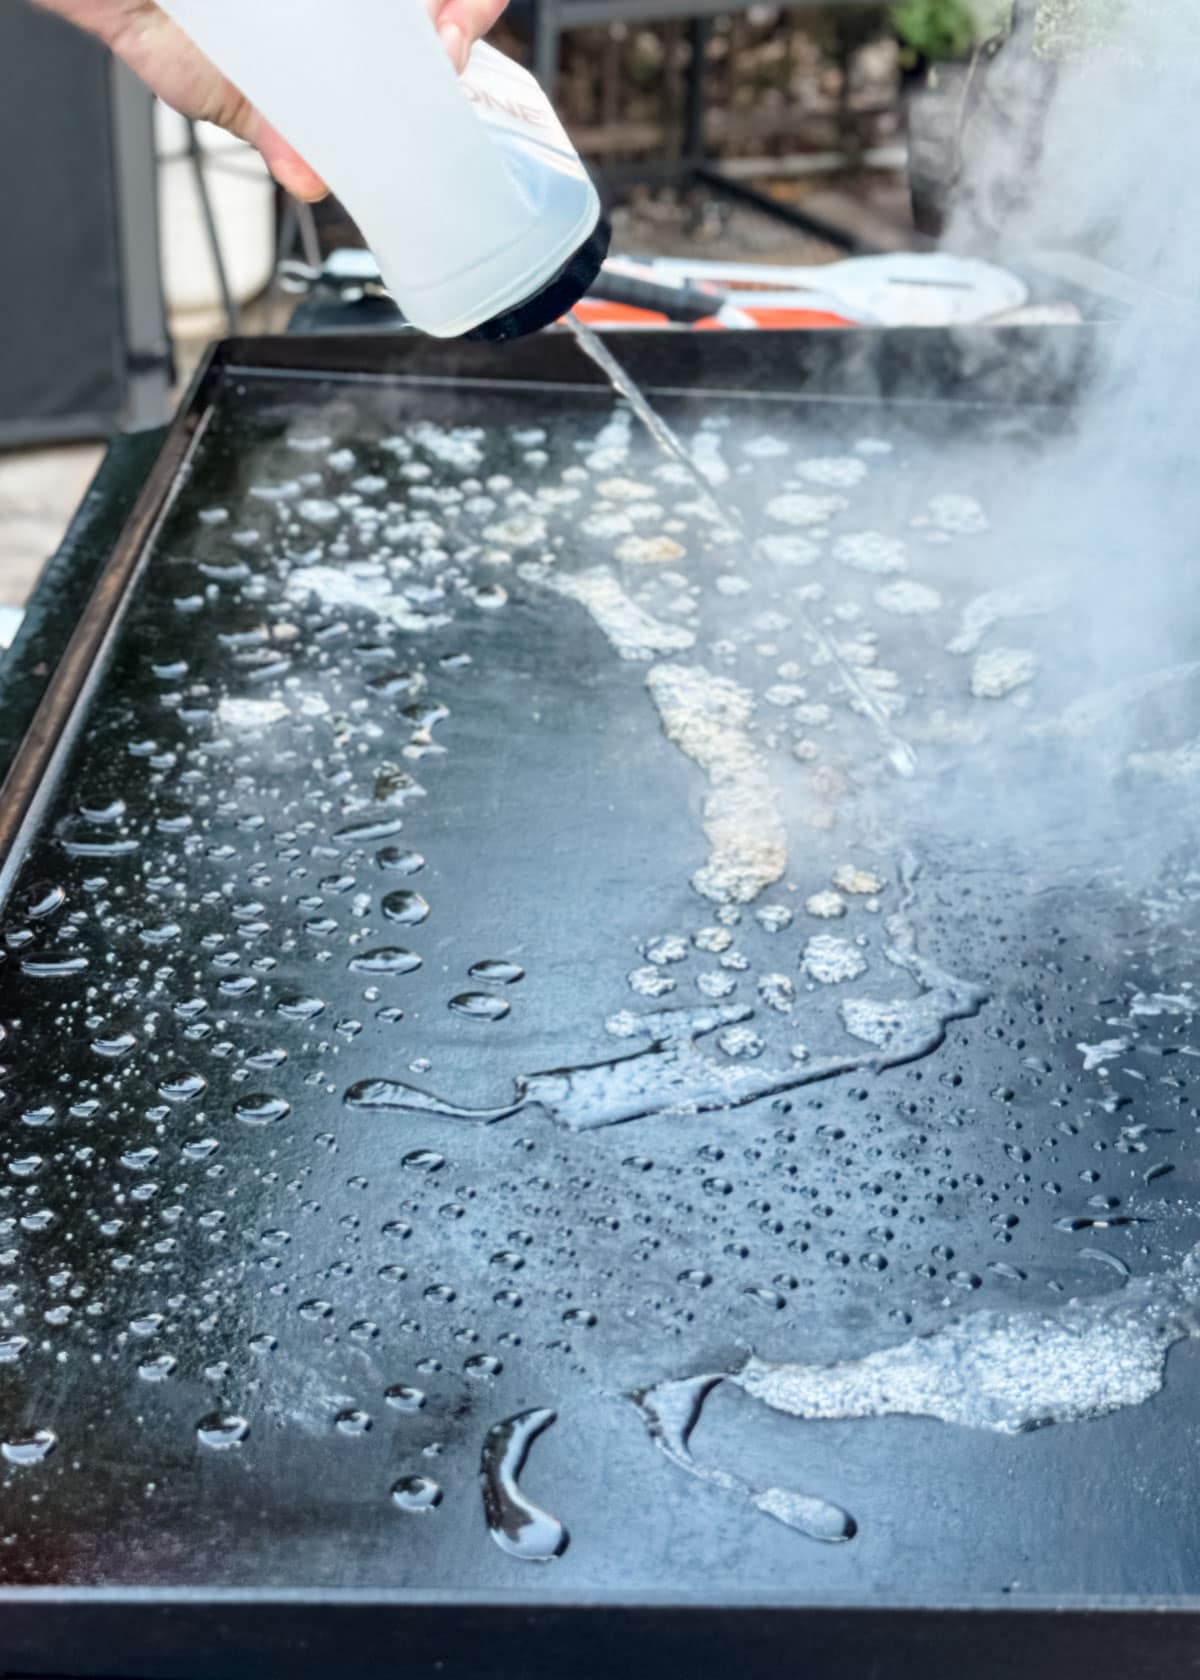
Before the water evaporates, use your scraper or spatula wrapped in paper towels to work the water across the surface and soak up the released grime.
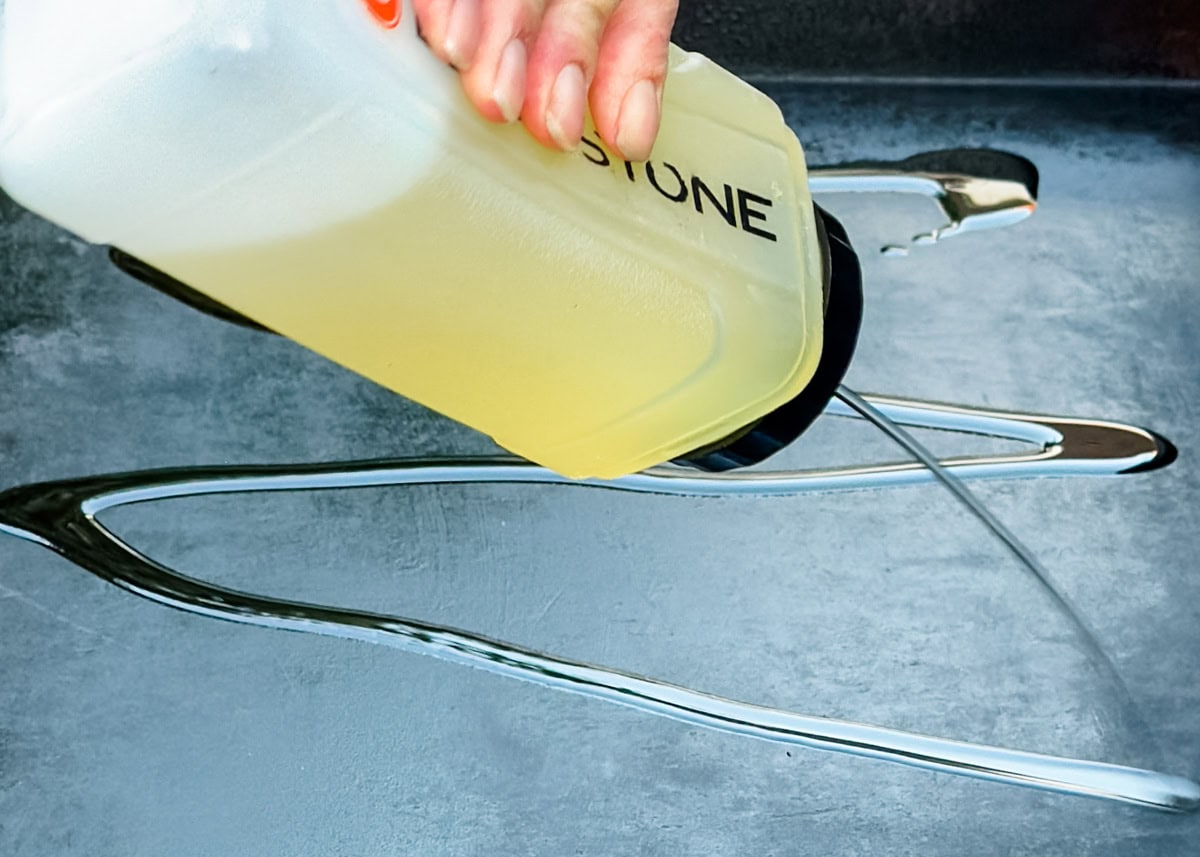
Depending on what you've cooked, you might need to repeat this process one or two more times. Keep swapping out the paper towels and adding fresh water until the liquid you're wiping up changes from dark brown to light yellow or clear.

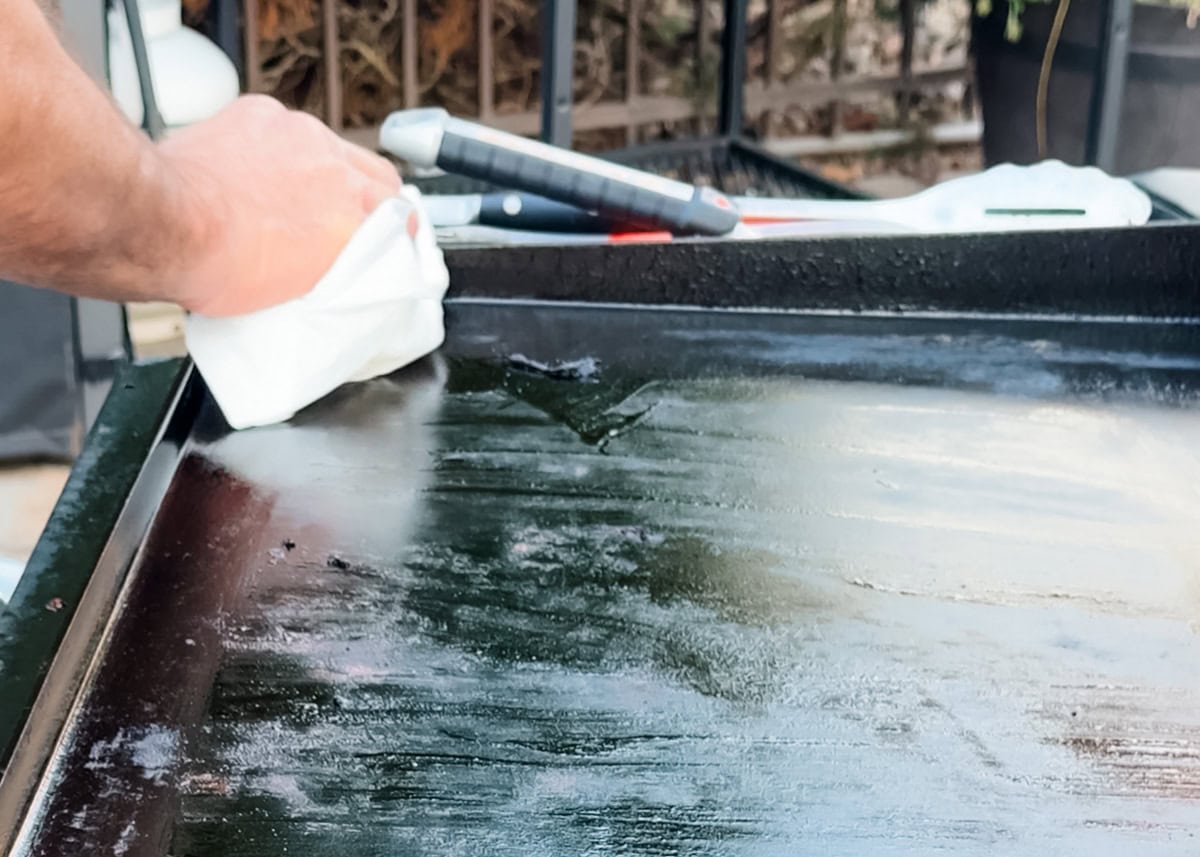
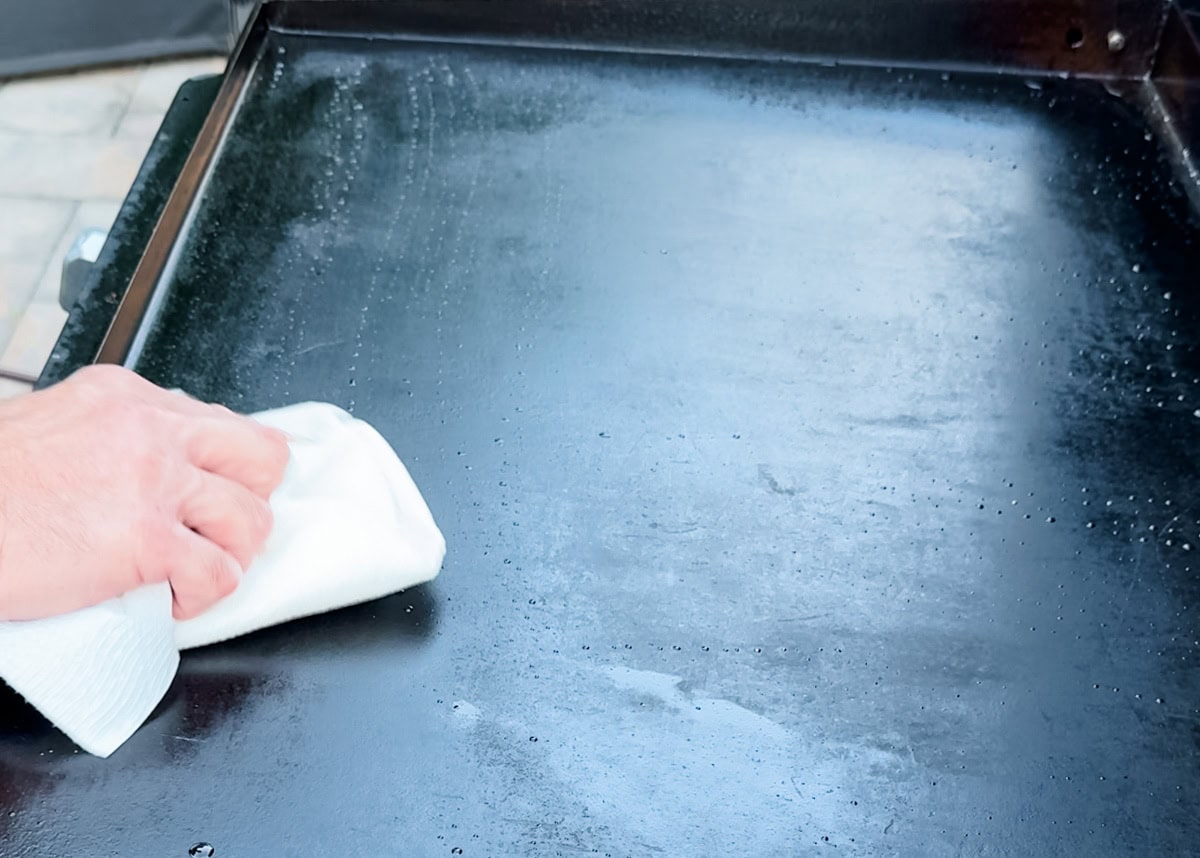
Step 2b: Wipe it Down Again
When you're finished steaming, grab some fresh paper towels and wipe down the cooking surface to remove any remaining moisture. Be sure to get into the corners and ensure the surface is completely dry for the final step.
At this point, we usually sit down to enjoy our meal while the griddle continues cooling. Once we're done eating, we come back to finish the cleaning process.
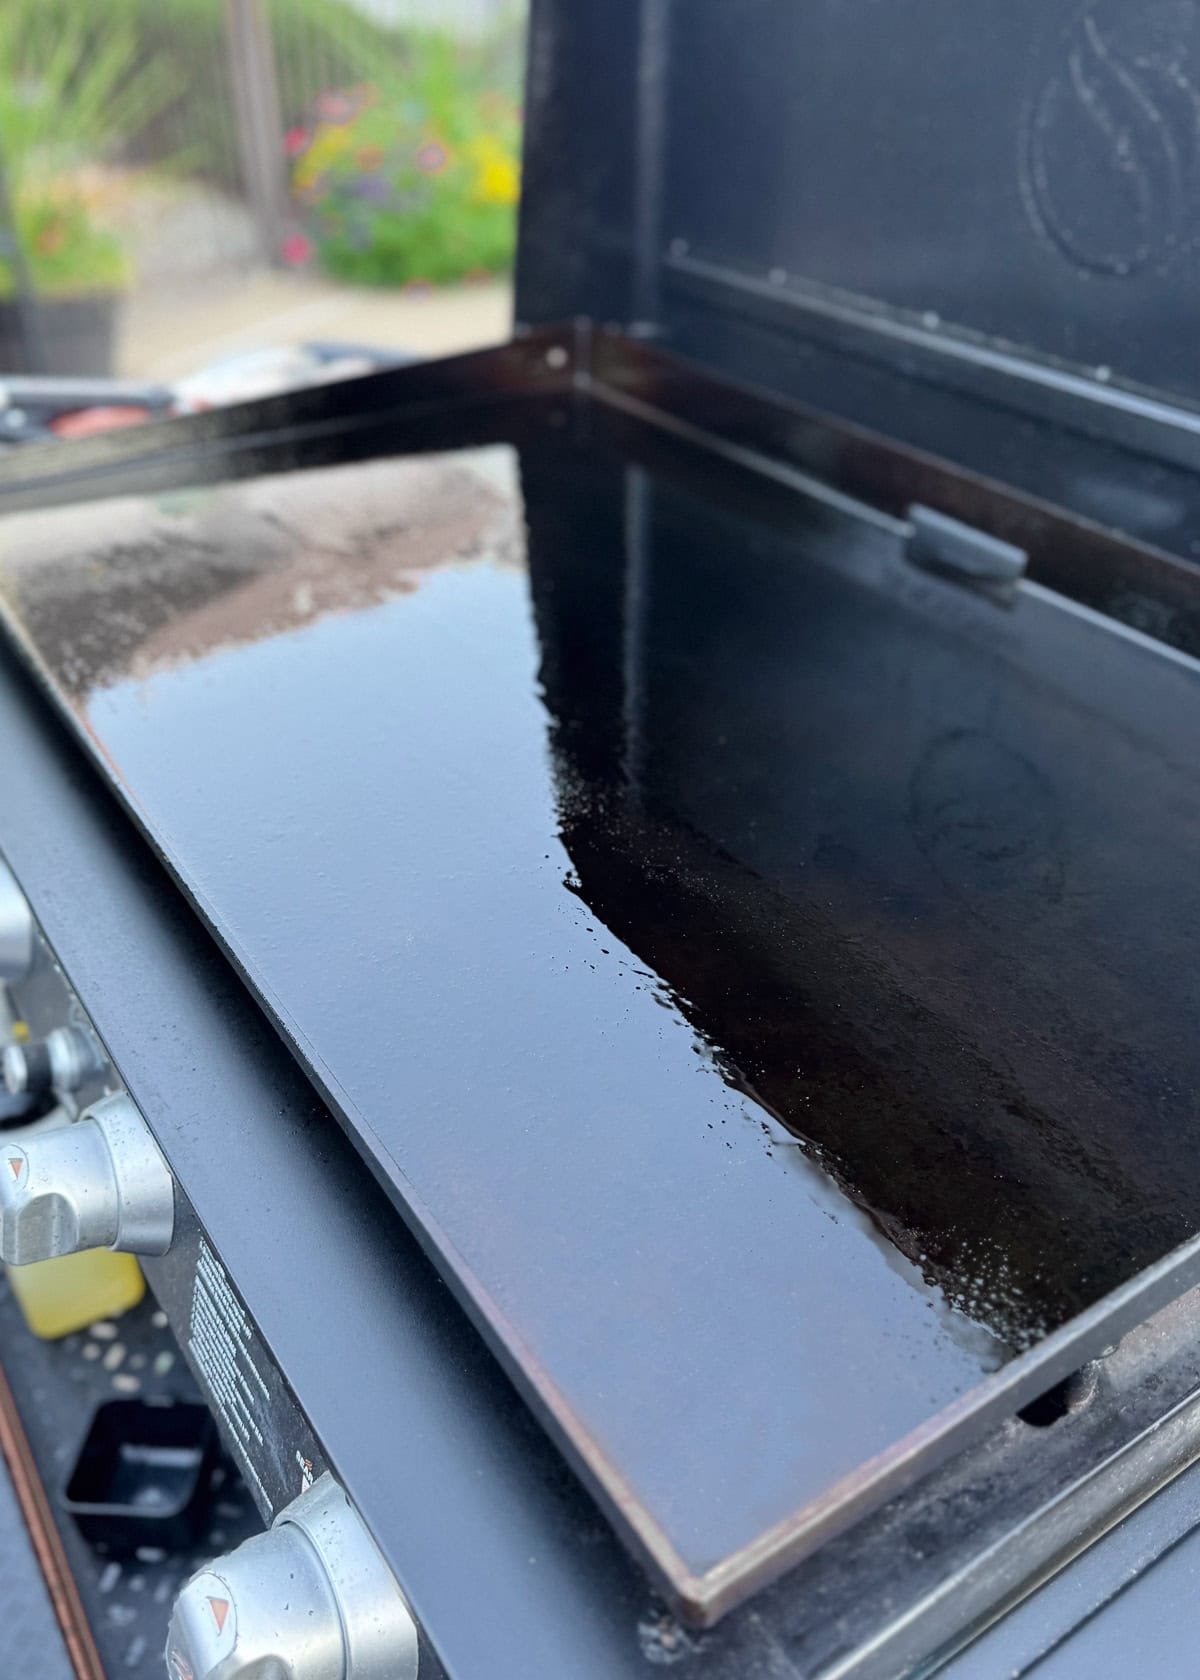
Step 3: Lightly Oil the Cooking Surface
Once the griddle has cooled down or is just slightly warm, it's time to apply a light coating of oil. For our 36" griddle, a couple of tablespoons is usually enough. Use a clean paper towel to evenly spread the oil across the entire surface, including the sides of the griddle plate.
Your layer of oil should be thin, like when you first seasoned your griddle. Remove any excess or pooled oil with paper towels. Oiling helps to prevent rust and keep the surface nonstick, ensuring your griddle is ready for your next cook when you are!
Step 4: Clean the Grease Cup, Griddle Body, and Cover the Griddle
After oiling the griddle, it's time to clean the grease cup. We always line ours with a disposable foil liner for the easiest cleanup. Grease containers, like the Fat Trapper System {affiliate link} are also great, allowing you to pour the grease from the cup into sealable bags that you can throw out mess-free.
Another option is to pop the foil liner into the fridge for a few hours. Once the fat solidifies, you can toss the liner cleanly into a trash bag. If you notice any drips left in the grease cup after removing the liner, wipe it down with the Blackstone degreaser spray or wash it in the sink.
Before covering the griddle, we like to wipe down the shelves and lid with the Blackstone degreaser spray to remove any oil splatter or residue.
If you have one, cover your griddle with its hard lid to protect the surface from the elements (and critters!). We also like to cover the entire griddle with a moisture-resistant fabric cover to keep everything clean between cooks.

Timing Your Cleaning
You might be wondering if you really need to start cleaning the griddle right away after cooking or if you can wait until after eating.
I hear you! Some foods, like grilled cheese and panini, start to lose their luster as they cool down. If you want to walk away from the griddle and enjoy your meal first, you absolutely can.
That said, having done both, I find that it's much easier to at least get the scraping step done before heading to the table. It only takes a couple of minutes!
If you do want to leave the whole thing for later, you'll need to turn the burners back on for a few minutes to warm up the griddle plate. Don't make it blazing hot, but warm enough to help melt down the gunk and get the water to sizzle.
More Griddle Guides
Cleaning a Blackstone Griddle After Cooking
Supplies
- griddle scraper or straight-edged metal spatula
- water, room temperature
- neutral, high heat oil, such as vegetable oil
- paper towels
- trash bag
- Blackstone 2-in-1 Degreaser Cleaner, (optional)
- heat-resistant grilling gloves, (optional, but recommended)
Instructions
Scrape the Griddle
- Remove your cooked food from the griddle. Turn off the burners and propane tank. If the griddle is very hot, let it cool down for a few minutes before getting started cleaning.
- Use your spatula or scraper to gently but firmly push food debris and oil on the cooking surface into the grease trap. Be careful not to burn yourself or gouge the seasoning with the scraper's edge. Wearing heat-resistant grilling gloves can help protect your hands and forearms.
- Wipe off any remaining visible oil with dry paper towels.
Steam Away the Residue
- Add a splash of room-temperature water onto the warm griddle, keeping your face and hands away from the steam that will rise. If the water doesn't bubble, briefly reheat the griddle until it's warm enough to sizzle. Turn the burners and propane back off before continuing.
- Before the water evaporates from the cooking surface, use your scraper/spatula wrapped in paper towels to wipe up the loosened grime.
- Repeat the process with more water and paper towels until the liquid you're picking up turns from dark brown to clear or light yellow.
- Use dry paper towels to wipe down the cooking surface and remove any excess moisture.
Lightly Oil The Cooking Surface
- Let the griddle sit until fully cooled or just slightly warm (this is a good time to go eat!). Apply a thin layer of oil to the cooking surface (a couple of tablespoons for a 36" griddle, less for smaller models).
- Use a paper towel to evenly coat the surface, including the sides of the griddle plate, and wipe away excess oil.
Clean the Grease Cup and Griddle Body
- Dispose of the cooled cooking grease using your preferred method. Since we use disposable foil liners in our grease cup, we either pour the grease into a sealable grease disposal bag or chill it in the foil liner to solidify before tossing it in the trash.
- Wipe down the shelves and lid (if your griddle has one) with degreaser spray. Don't spray any degreaser on the cooking surface--it can affect your seasoning.
- Cover the griddle with the lid and/or a moisture-resistant cover to protect it until your next cook.
Video
Note: We are not affiliated with Blackstone Products. This post reflects our own experiences in cleaning and maintaining the Blackstones we own. Your mileage may vary--always consult the safe maintenance practices recommended for your specific griddle.


Leave a Reply